|
|
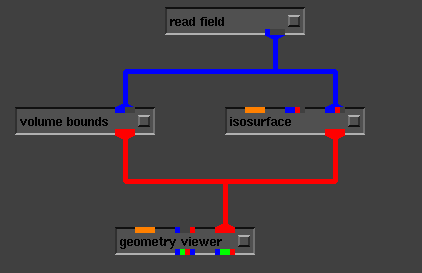
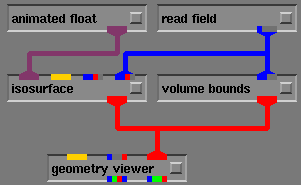
An isosurface a surface drawn around points in 3D space that are of the same value; and equipotential surface. The isosurface below represents the places where you would have a 50% probability of finding an electron in the d0 orbital of a hydrogen atom. The data for the hydrogen orbital is in "fields/hydrogen.fld" from the default starting directory for the read field module. |

|
The volume bounds module defines the limits of the dataset in 3D space for the geometry viewer so that it knows how far to zoom out to view the entire scene. It also draws the colored box around the data. This box can be turned off using the volume bounds control panel.
|

|
The isosurface level is controlled by a dial on the isosurface module's control panel. The minimum and maximum levels for the dial widget are are set automatically to be the range of the dataset. The most important of the other parameters in the isosurface control panel is the optimize wire button. When you view the isosurface as a wireframe, it looks scrambled. Selecting optimize wire sorts the vertices so that the lines can be rendered properly. |
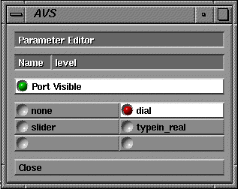
By default, the control port for the level dial is hidden on the isosurface module. You can make it visible using the following steps.
 using the right mouse
button
using the right mouse
button  . This should cause
a module editor panel to popup.
. This should cause
a module editor panel to popup.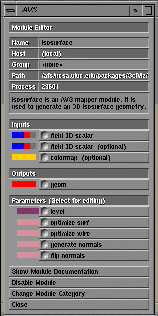
 .
.


Note:All modules that have widgets allow you to make them visible to the network in this same manner.
Now, select an animated float module from the Data Input module
list to build the following network.
(click here to download this network)
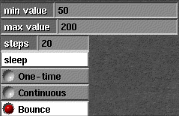
The range of this particular dataset is 0-255, so the animated float should be set to vary from 50-200 in about 20 steps. This is set in the animated float control panel (on the left side of the screen).
Pressing the  button will trigger its operation.

|
Quicktime Movie
|
(click here to download the network)
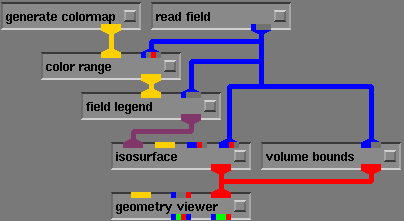
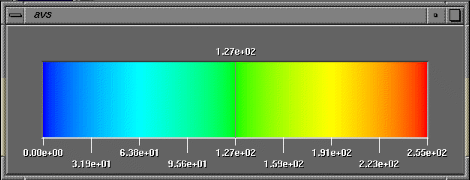
You can select different Isosurface levels by clicking on the color bar. The
thin vertical line represents the currently selected isosurface level.